An introduction to using Chaser with Zapier
Integration requirements
- To use this integration, you must have an active Chaser account or be registered for Chaser’s Free Trial.
- You must have an active Zapier account.
- Your ERP or Accounting System must provide a public Zapier integration OR you must have access to Google Drive/One Drive to manage online spreadsheets.
Table of contents
Understanding Zapier integration
This integration is beneficial for businesses and financial teams seeking to automate their credit control processes, especially those using accounting systems or ERPs not directly supported by Chaser.
What is Zapier?
Zapier is an online tool that connects apps and automates workflows, making it easier to manage tasks without needing technical skills. Zapier acts as a bridge between different software, enabling them to communicate and work together seamlessly. Using Chaser with Zapier allows you to connect Chaser with various apps and services, streamlining your credit control tasks. Zapier enables automatic data transfer between Chaser and other systems, like accounting software and online spreadsheets, simplifying processes such as syncing invoices, updating customer information, and managing credit notes. This is particularly useful for those using accounting systems not directly compatible with Chaser, offering an easy way to integrate their data.
Setting up your Zapier account
How to sign up for Zapier
- Navigate to the Zapier website: Go to Zapier's official website.
- Sign-up process: Click on the 'Sign Up' button, which you can find on the Zapier homepage.
- Create your Zapier account: To create your Zapier account, simply follow the account creation and setup process outlined on the Zapier website.
Understanding Zapier’s pricing plans
Free plan: Explore Zapier’s free plan, ideal for basic automation needs. It includes a limited number of tasks per month and access to single-step Zaps.
Paid plans overview: To understand the various paid plans offered by Zapier, including details on tasks per month and additional features, please refer to the Zapier pricing page here.
Choosing the right plan: Assess your business needs based on the number of tasks you anticipate and the complexity of the Zaps required.
Plan upgrades: Understand that you can start with a basic plan and upgrade as your business automation needs grow.
Cost considerations: Review the costs associated with each plan. Remember, the pricing varies based on the number of tasks and the level of functionality required.
Actions and triggers
Zapier users triggers and actions to build workflow. Triggers are events that initiate the workflow (for example a new invoice being added or an existing invoice being updated in your connected application or online spreadsheet). Actions determine what Zapier should happen in Chaser when the triggers criteria are met.
Requirements to connect to Chaser
In order to create a seamless integration between your accounting system, ERP or spreadsheet, Chaser will require the following zaps to be set up
- Create customer
- Update customer
- Create invoice
- Update invoice
- Create credit notes (optional if you use credit notes within your system)
- Update credit notes (optional, as above)
- Create additional contacts (optional, if you want to add more than one contact to a specific customer)
- Update additional contacts (optional, if you want to update or delete additional contacts)
- Upload PDF invoices (optional, if you want the PDF invoices to be available in Chaser for you and your customers)
If the system that you intend to connect to Chaser via Zapier is a listed Zapier application, check which of the above triggers are supported. For supported triggers, you can simply select the trigger and connect it to the relevant Chaser action. If your system is missing some triggers, such as credit notes, you can use the online spreadsheet options to upload the required data, please see our online spreadsheet instruction here.
If your system is not a listed Zapier application, please see our step-by-step guide on how to easily set up your integration using a Google or One drive spreadsheet.
Building your first zap
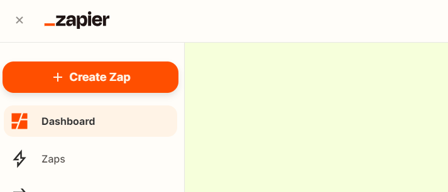
- Access Zapier dashboard: Log into your Zapier account and navigate to the dashboard.
- Initiate a new zap: Click on the ‘Create Zap’ button, located at the top left of the page.
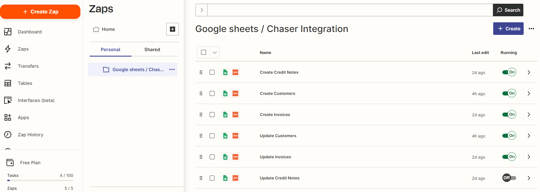
- Naming Your Zap: Give your Zap a name that reflects its function, making it easier to identify later. The Zap will be now visible in the Zaps section.
Setting up triggers using Zapier's integrations
- Access your existing Zap: Navigate to your Zapier dashboard and open the Zap you previously created.
- Selecting the trigger: Click on 'Trigger' in your Zap setup. Use the search function to find your application.
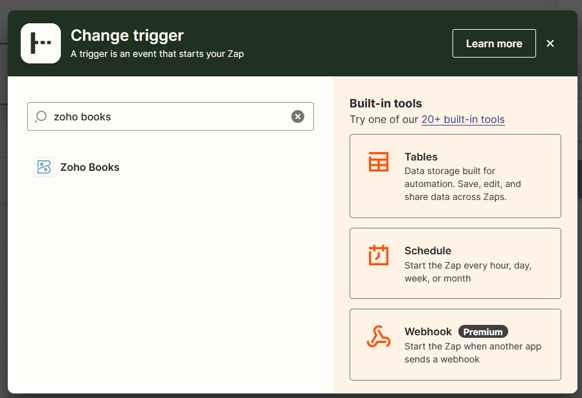
- Choosing the trigger event: A sidebar will appear with a dropdown menu. Select the event you want to trigger the Zap (e.g., new customer, new invoice).
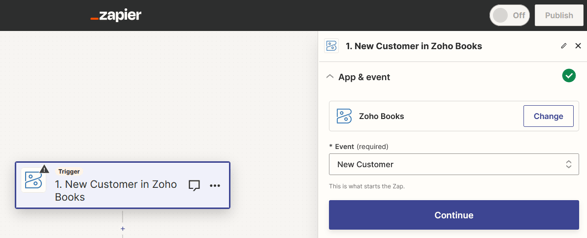
- Connecting to the third-party service: Log in to the account that you are connecting (e.g. your accounting system, ERP)
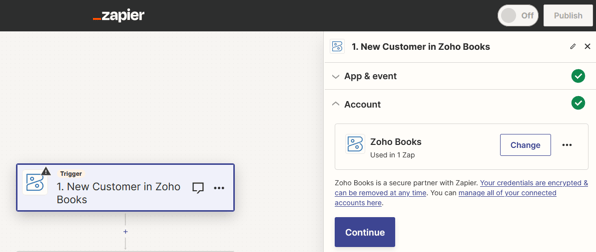
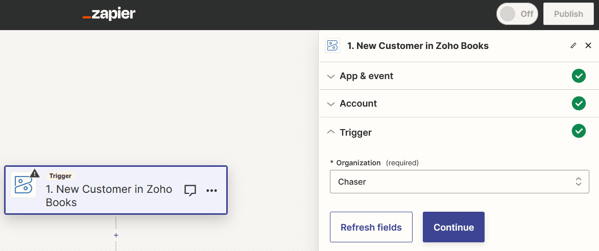
- Selecting the organisation: In the trigger setup, specify the organization within the third-party service (e.g., Chargebee) that you want to connect to Zapier.
- Testing the trigger: In the test section of the setup, click on 'Test' to ensure the trigger is functioning correctly. Zapier will attempt to pull in data based on your trigger settings.
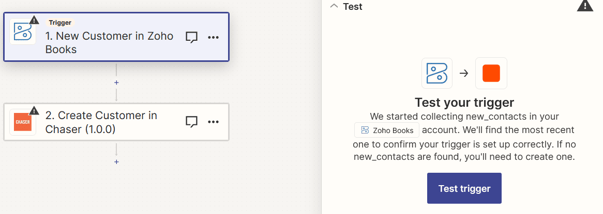
- Finalising the trigger setup: Once the test is successful and confirms the trigger works as expected, your trigger setup is complete.
Setting up actions
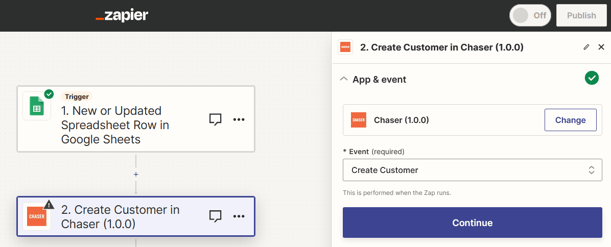
- Accessing the action in your Zap: In your Zapier dashboard, navigate to the Zap you are working on. Click on "Action" to set up the response to your trigger.
- Choosing Chaser integration: Search for Chaser in the Zapier app directory and select it as your action app.
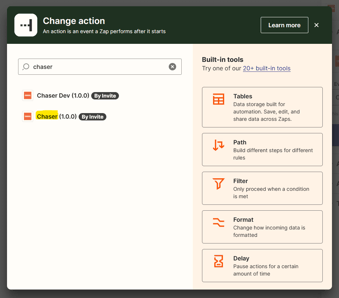
- Selecting the desired action: A sidebar will appear with a dropdown menu. Choose the action you want Chaser to perform when the trigger occurs (e.g., Create Customer, Update Customer, Create Invoice, Update Invoice). Then, click on 'Continue'.
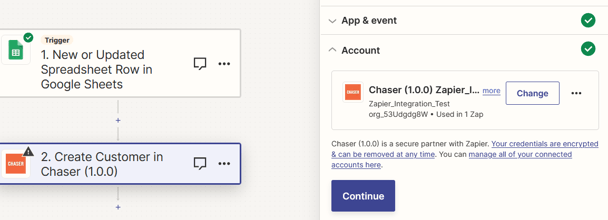
- Connecting to your Chaser account: In the account section of the action setup, connect Zapier to your Chaser account. Retrieve your API keys from your Chaser account settings. For guidance on retrieving your API keys, refer to the guide here.
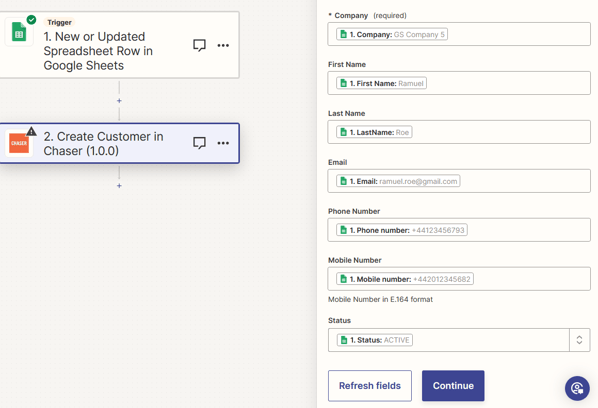
- Configuring action details: In the action setup, Select the organisation that you want to connect. This step is crucial for accurate data transfer. For a detailed walkthrough on matching fields, please refer to the detailed Zaps configuration guide here.
- Testing the action: Click on "Test Step" in the test section. Zapier will verify if the Zap is configured correctly. If successful, a confirmation message will appear, indicating that your setup is correct.
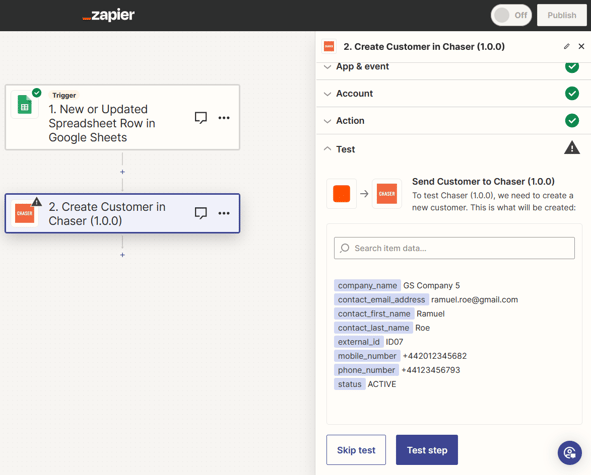
- Publish the Zap: Click on the button "Publish" to validate your zap and it will be up and running.
FAQs
What is Zapier and how does it integrate with Chaser?
Zapier is an online automation tool that connects different apps to automate workflows. It integrates with Chaser to streamline credit control processes by connecting with various accounting systems and online spreadsheets.
Do I need a Zapier account?
Yes, you need a Zapier account to integrate Chaser with other applications. You can sign up for free or choose a plan that suits your business needs.
How do I set up a Zapier account to use with Chaser?
To set up a Zapier account, visit Zapier's website, sign up with your email, and follow the setup process. Choose a pricing plan that suits your business needs.
What are the key steps to create a Zap in Zapier for Chaser?
Key steps include creating a new Zap, setting up a trigger from your chosen app or online spreadsheet, and then selecting an action in Chaser, such as creating or updating invoices and customers.
How long will it take me to set up?
The setup time can vary, but typically it takes about 30 minutes to an hour to configure the required Zaps, depending on your familiarity with Zapier and the complexity of the workflow you are creating.
Can I use online spreadsheets as triggers in Zapier for Chaser?
Yes, you can use online spreadsheets like Google Sheets or Excel in OneDrive as triggers by linking them to Zapier and setting up specific events as triggers.
What actions can I perform with Chaser through Zapier?
Chaser integration allows the creation and updating of customers, invoices, and credit notes through Zapier.
Are there any limitations to the Chaser-Zapier integration?
The integration depends on Zapier, so any downtime or issues with Zapier can affect it.
What if the accounting system I use doesn’t have a direct integration with Chaser?
To facilitate data transfer, you can use Zapier to connect Chaser with unsupported accounting systems, mainly through online spreadsheets.
Is technical expertise required to set up and use Chaser with Zapier?
No, you don’t need to be technically skilled. Our step-by-step guide is designed to help users of all technical levels to set up and use the integration.
What should I do if I encounter issues with my Zap?
You can consult Zapier’s help documentation or contact Chaser’s support at support@chaserhq.com for assistance with issues related to Chaser integration.
Can I automate all my Chaser functions with Zapier?
While Zapier automates many functions, some specific features of Chaser might not be fully automated due to the nature of triggers and actions available in third-party apps.
What happens if I input the incorrect format into my file?
If the data format in your file doesn't match the expected format in Zapier or Chaser, it can lead to errors or failed data transfer. It’s important to ensure that all data, such as dates and IDs, follow the specified format guidelines.
I have made a mistake in my Google Sheets file data, how do I correct this?
Adding a contact incorrectly: Simply edit the correct details in Google Sheets. The next time the Zap runs, it will update the information in Chaser.
Inputting the wrong due date: Update the date in the correct format in your Google Sheets. Zapier will process this update on its next run.
Other Errors: Correct the data directly in Google Sheets. If the Zap has already run, you may need to manually re-run the Zap.
My Zap has errored due to incorrect data, how do I fix this?
First, identify the source of the error, which is usually indicated in the error message from Zapier. Correct the data in your Google Sheets file or Chaser setup as needed. Then, you can re-test the Zap in Zapier to ensure it runs correctly with the updated data.
Need additional support?
Please refer to our Troubleshooting guide if you need further assistance.