Invoices
Learn how to filter, sort and manage outstanding invoices on your receivables page, as well as understanding allocated and unallocated payment behaviour.
Last updated: January 01, 1970
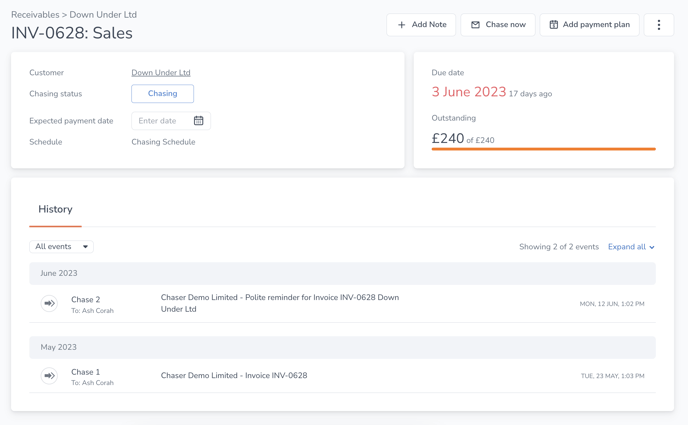
Access a specific invoice page via the Receivables > Invoices page or the specific Customer view by clicking on an invoice number.

View up-to-date invoice information including:
- Customer
- Chasing status
- Expected payment date
- Schedule
- Initial value
- Outstanding value
- Chasing history including sent and received emails and notes
Action any of the following:
- Set an expected payment date
- Change schedule
- Change chasing status
- Add note
- Chase now
- Add payment plan
- Dispute invoice
- Download invoice
- View in your accounting software
Learn more about Chasing criteria here.
For Xero users
If you add an expected payment date in Xero, it will sync into Chaser. Likewise, if you add an expected payment date in Chaser, it will sync into Xero and be saved against the relevant invoice. This won’t happen if:
- The invoice has a part payment, prepayment, or credit note applied against it within Xero
- The invoice was created within an active 'lock period' in Xero
In these cases, the expected payment date will revert to the original expected payment date after being saved in Chaser and will not push through into Xero.
How payment reconciliation is reflected in Chaser
If you allocate a debtor's payment against a specific invoice in your accounting software, this will be reflected within Chaser against the invoice after a sync has happened. However, if your debtor makes a payment which you've not allocated to a specific invoice, this will sit as a credit against the customer within Chaser. You would the need to reconcile this within your accounting software for the remaining balance to be reflected accurately within Chaser.
In addition, statements sent from Chaser will include unallocated credits.
Notes
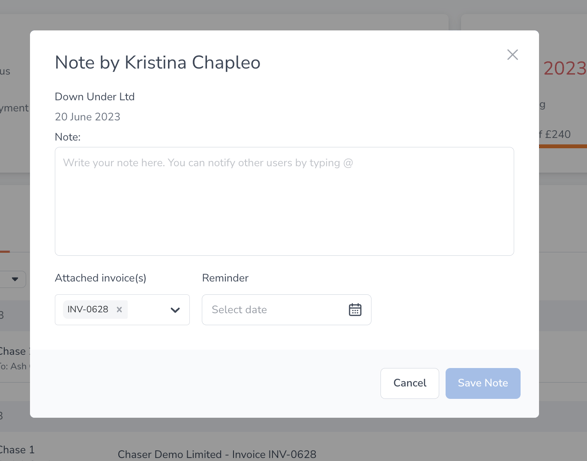
Add notes straight from this screen. Notes remain attached to invoices until they’re paid. Select the ‘Add Note’ button and enter your comments in the note module. Click ‘Save note’ to confirm. Set a reminder notification using the calendar module.
Attach a note to multiple invoices using the dropdown menu under 'Attach invoices'. Select the relevant invoices.

History
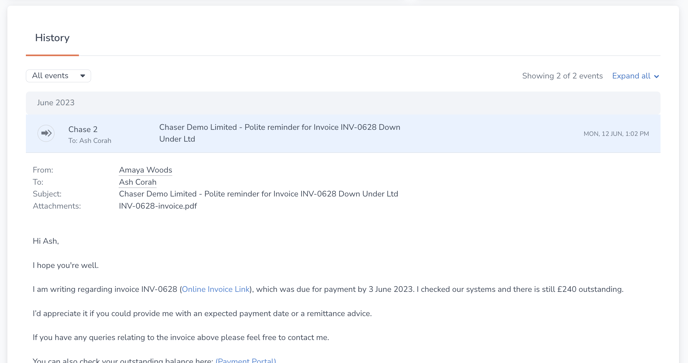
View all invoice history including notes, automated and manual chases, monthly statements, ‘Thank you for paying’ emails and customer responses regarding this invoice. Consult the conversation history at any time.
View the detail of each event by clicking on the row you wish to expand.

Invoice history can be exported using the Export button. Filter on a specific event (such as Chasing or Notes) to export certain event types.