Last updated: January 01, 1970
.png?width=688&height=177&name=Frame%201707480122%20(1).png)
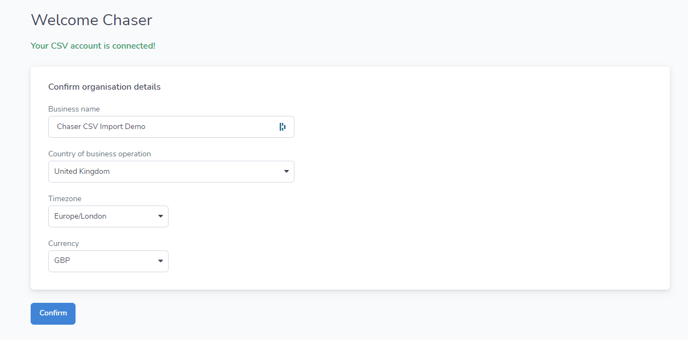
Use the CSV Uploader to seamlessly bring your data into Chaser
If your accounting system or ERP doesn’t directly integrate with Chaser, you can still use Chaser and keep your data up to date effortlessly.
You can manually upload your data with a CSV file or set up an SFTP connection for secure and automated syncing—giving you full control over your accounts receivable data in Chaser.
Get started
- Start your 10-day free trial—no payment details needed. Just enter your details to sign up here.
- Check your inbox for a confirmation email. Once it arrives, follow the link to create your password and log in to Chaser.
- Go to the Integrations menu and select the CSV option.
- Choose how you want to upload your data:
- Upload files whenever you need.
- Or set up an SFTP connection for secure, automated imports. Connect an SFTP server.

6. Set up your data mappings
-
- Choose your default date and numeric formats. You can override these later for specific fields if needed.
- Map your data fields to match key data points like Customers, Invoices, and Credit Notes.
- Upload a sample data file to test your setup (make sure it includes a column header row).
- Assign each data point to the correct column in your file.

7. Save your data mappings.
Export data from your system
To use the CSV import tool, you’ll need to export two key types of data from your system (or obtain them elsewhere):
- Invoices (e.g. Invoice number, Due date, Amount due, Amount paid etc.).
- Customers (e.g. Customer name, email address, First name, Last name, Currency, Mobile Number etc.).
You can also upload additional data, including Credit Notes, Payments, Additional Contacts, and Invoice PDFs.
How your data is processed in Chaser
Invoices
When you upload invoices, Chaser tracks updates to key fields, such as the amount due and amount paid.
Example:
-
- On January 10, you upload an invoice list containing INV-001 (identifier: 01234356). At this time:
- Amount Due: £1,000.00
- Amount Paid: £0.00
- On January 11, you upload an updated invoice list, again including INV-001, but now:
- Amount Due: £600.00
- Amount Paid: £400.00
- On January 10, you upload an invoice list containing INV-001 (identifier: 01234356). At this time:
Chaser recognises the invoice and updates the record to reflect the new due amount and payment.
However, if you upload an updated invoice list on 11th January that does not include INV-001, Chaser will keep the existing data for that invoice unchanged.
Customers
Chaser also tracks updates to customer records when you upload new data.
Example:
-
- On January 10, you upload a customer list that includes Cricket Coaching Camps Limited (identifier: C_1). At this time:
- Email Address: support@email.com
- Tags: None
- On January 11, you upload an updated list that includes Cricket Coaching Camps Limited, but this time:
- Email Address: team@email.com
- Tags: Good Payer, Direct Debit
- On January 10, you upload a customer list that includes Cricket Coaching Camps Limited (identifier: C_1). At this time:
Chaser identifies that the email address has changed and that two new tags have been added, updating the record accordingly.
However, if you upload an updated customer list on January 11 that does not include Cricket Coaching Camps Limited, Chaser will keep the existing data for that customer unchanged.
Additional data you can upload
Alongside invoices and customers, you can also upload:
-
-
Credit notes
-
Additional contacts
-
Payment details
-
Data formatting & field requirements
-
Data formatting and field requirements
Use this document to get details on:
-
- Each data point and Chaser’s default data formatting (which you can override during mapping).
- Required vs. optional fields for each CSV file.
Upload historical data
You can upload historical data as part of your first import. However, Chaser archives paid invoices after 90 days.
Upload your data manually
Once you've set up data mapping, it's time to upload your data to Chaser.
- Go to Import > Upload.
- Choose your CSV file and start the upload.

If you prefer, you can also set up an SFTP connection for automated uploads.
🔹 Note: The upload option supports CSV files only.
Upload invoice PDFs
Download invoices in PDF format from your system and ensure the file name matches: InvoiceID (column 1 in the invoice.csv spreadsheet).
To automatically attach invoice PDF copies to your chasing emails:
- Go to Import > Upload > Select Invoice PDFs.
- Upload your Invoice PDFs.
To include invoice copies in your chasing emails, go to Manage > Templates and select attach copy invoice in the options underneath each of your templates (image below).

Choose your data upload frequency
How often you upload data depends on your business needs, but to keep Chaser up to date, follow these best practices:
- Upload before your chase time(s). For example, if your Chase time is 11 AM on Tuesday, upload your data by 9 AM on Tuesday to ensure all payments are reconciled.
- Upload at least once a week to keep your records accurate.
Troubleshooting
If an invoice already exists in Chaser and you need to remove it, update its Status to VOIDED, DELETED, or PAID. Chaser will retain the existing data unless your update modifies or removes it.
- Ensure the missing data in the columns highlighted first is input into Sage to stop this from happening on future exports
- Export the data as CSV
- Upload the data without checking it, so it keeps the date values
Related articles